
 Watch the Birdie!
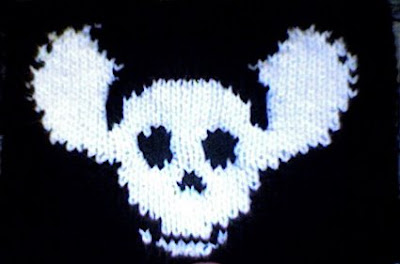
So after much swearing and ripping of rows I have finished the "banner" intended as a scarf, the image became a little long so I turned into a banner instead. I may try a scarf later.
I used Caron Simply Soft 100% Acrylic Worsted in Dark Country Blue and Heather Grey for the colors like the movie. I changed it to banner or wall hanging. It is about 18-1/2" long from end to end fringe adds about 3" to 6" to over all length (depending on fringe length).
A few notes about the pattern:
The instructions below are for the WRONG SIDE of the pattern only. The RIGHT SIDE is KNIT every row! Just knit nothing else. I did say KNIT the RIGHT SIDE right?
Ravenclaw Illusion (Shadow) Banner
Approx: 18-1/2" (23-1/2" with fringe)
Materials: Caron Simply Soft 100% Acrylic in Dark Country Blue [MC] and Grey Heather [CC] (no dye lot), 1 skein each (about 315 yards). You may choose any worsted weight yarn in the color of your choice.
Needles: Size 6 (US) straight
Gauge: is about 22 sts and 36 rows = 4", or about 6-1/2 (7) sts. per inch.
NOTES: Two rows of each color are worked and then changed for the next two rows so on and so forth, continue in this manner for the entire project. Carry the colors loosely up the side at each color change, no one will ever notice. Instructions are written for the wrong side only, KNIT every right side (odd numbered) row.
It takes four rows of knitting to complete one row of pattern, the first row is establishing the illusion [CC] the next rows follow the illusion in reverse [MC] making the stitches "pop" out form the material.
The first and last 2 stitches of pattern are a selvage edge to help the piece lay flat and not roll. Light blocking will help if your banner rolls too much.
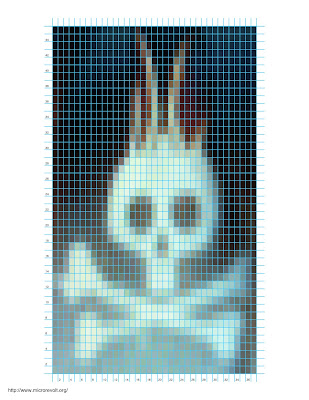
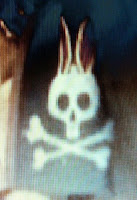
The design (illusion) is a total of 136 rows, not counting border rows. The photo is a mirror image, your bird will face the opposite direction when completed.
Abbreviations:
K = Knit
P = Purl
MC = Main Color
CC = Contrast Color
sts. = stitches
CO 35 sts. in MC
Row 1 KNIT
Row 2 PURL
Change to CC
Row 3 Knit
Row 4 Purl
Change to MC
Rows 5 and 6 repeat rows 1 and 2 one time. (Border is complete)
Row 7 - Change to CC, Knit to end (right side row)
(Begin Pattern, this row is the toe)
Row 8 - k2, p10, k1, p to last two sts. k2
Change to MC Knit to end
Row 10 - K12, p1, k to end.
Continue in this fashion, changing from MC to CC every two rows for the rest of the rows
Row 12 - k2, p10, k1, p2, k1, p to last two sts. k2
Row 14 - k12, p1, k2, p1, k to end
Row 16 - k2, p10, k4, p to last two sts., k2
Row18 - k12, p4, k to end
Row 20 - k2, p11, k2, p to last two sts., k2
Row 22 - k13, p2, k to end
Row 24 - k2, p12, k1, p5, k1, p to last two sts., k2
Pow 26 - K14, p1, k5, p1, k to end
Row 28 - k2, p11, k2, p4, k4, p to last two sts., k2
Row 30 - k13, p2, k4, p4, k to end.
Row 32 - k13, p13, k to end.
Row 33 - Knit across to end. (just making sure you're still knitting every right side row)
Row 34 - k2, p11, k14, p to last two sts, k2
Row 36 - k13, p14, k to end.
Row 38 - k2, p10, k12, p2, k1, p to last two sts, k2
Row 40 - k12, p12, k2, p1, k to end.
Row 42 - k2, p9, k10, p to last two sts, k2
Row 44 - k11, p10, k to end.
Row 46 - k2, p8, k10, p to last two sts, k2
Row 48 - k10, p10, k to end.
Row 50 - k2, p8, k9, p to last two sts, k2
Row 52 - k10, p9, k to end
Row 54 - k2, p7, k10, p to last two sts, k2
Row 56 - k9, p10, k to end.
Row 58 - k2, p7, k10, p to last two sts, k2
Row 60 - k9, p10, k to end
Row 62 - k2, p7, k11, p to last two sts, k2
Row 64 - k9, p11, k to end
Row 66 - k2, p7, k11, p to last two sts, k2
Row 68 - k9, p11, k to end.
Row 70 - k2, p5, k1, p2, k12, p to last two sts, k2
Row 72 - k7,p1, k2, p12, k to end
Row 74 - k2, p5, k7, p1,k7, p to last two sts, k2
Row 76 - k7, p7, k1, p7, k to end
Row 78 - k2, p5, k7, p1, k8, p to last two sts, k2
Row 80 - k7, p7, k1, p8, k to end
Row 82 - k2, p6, k5, p2, k8, p to last two sts, k2
Row 84 - k18, p5, k2, p8, k to end
Row 86 - k2, p7, k3, p3, k9, p to last two sts, k2
Row 88 - k9, p3, k3, p9, k to end
Row 90 - k2, p13, k8, p to last two sts, k2
Row 92 - k15, p8, k to end
Row 94 - k2, p12, k10, p to last two sts, k2
Row 96 - k14, p10, k to end
Row 98 - k2, p12, k9, p to last two sts, k2
Row 100 - k14, p9, k to end
Row 102 - k2, p11, k11, p to last two sts, k2
Row 104 - k13, p11, k to end
Row 106 - k2, p12, k8, p1, k1, p to last two sts, k2
Row 108 - k14, p8, k1, p1, k to end
Row 110 - k2, p13, k8, p to last two sts, k2
Row 112 - k15, p8, k to end.
Row 114 - k2, p14, k7, p to last two sts, k2
Row 116 - k16, p7, k to end
Row 118 - k2, p14, k5, p1, k1, p to last two sts, k2
Row 120 - k16, p5, k1, p1, k to end
Row 122 - k2, p15, k5, p to last two sts, k2
Row 124 - k17, p5, k to end
Row 126 - k2, p15, k3, p1, k1, p to last two sts, k2
Row 128 - k17, p3, k1, p1, k to end
Row 130 - k2, p15, k1, p1, k1, p to last two sts, k2
Row 132 - k17, p1, k1, p1, k to end
Row 134 - k2, p14, k1, p to last two sts, k2
Row 136 - k16, p1, k to end
This last row completes the Raven Illusion (Shadow).
Row 137 in CC knit across to end
Row 138 Purl across to end
Row 139 - in MC Knit across to end
Row 140 - Purl across to end
Row 141 in CC knit across to end
Row 142 Purl Across to end
Row 143 in MC Knit across to end
Row 144 - BO (Knit or Purl)
Fringe
Cut 14 12" inch pieces of MC and 13 12" pieces CC divide into our groups of three, using two strands of MC and 1 strand of CC for middle fringe piece. Find the center bottom of your banner and attach the blue/grey fringe there, alternate the other eight sections and space them equally along the bottom of the banner.
Hang it on your wall, your all done!


